Business
Skylum Luminar Review : Here’s What the Experts Say
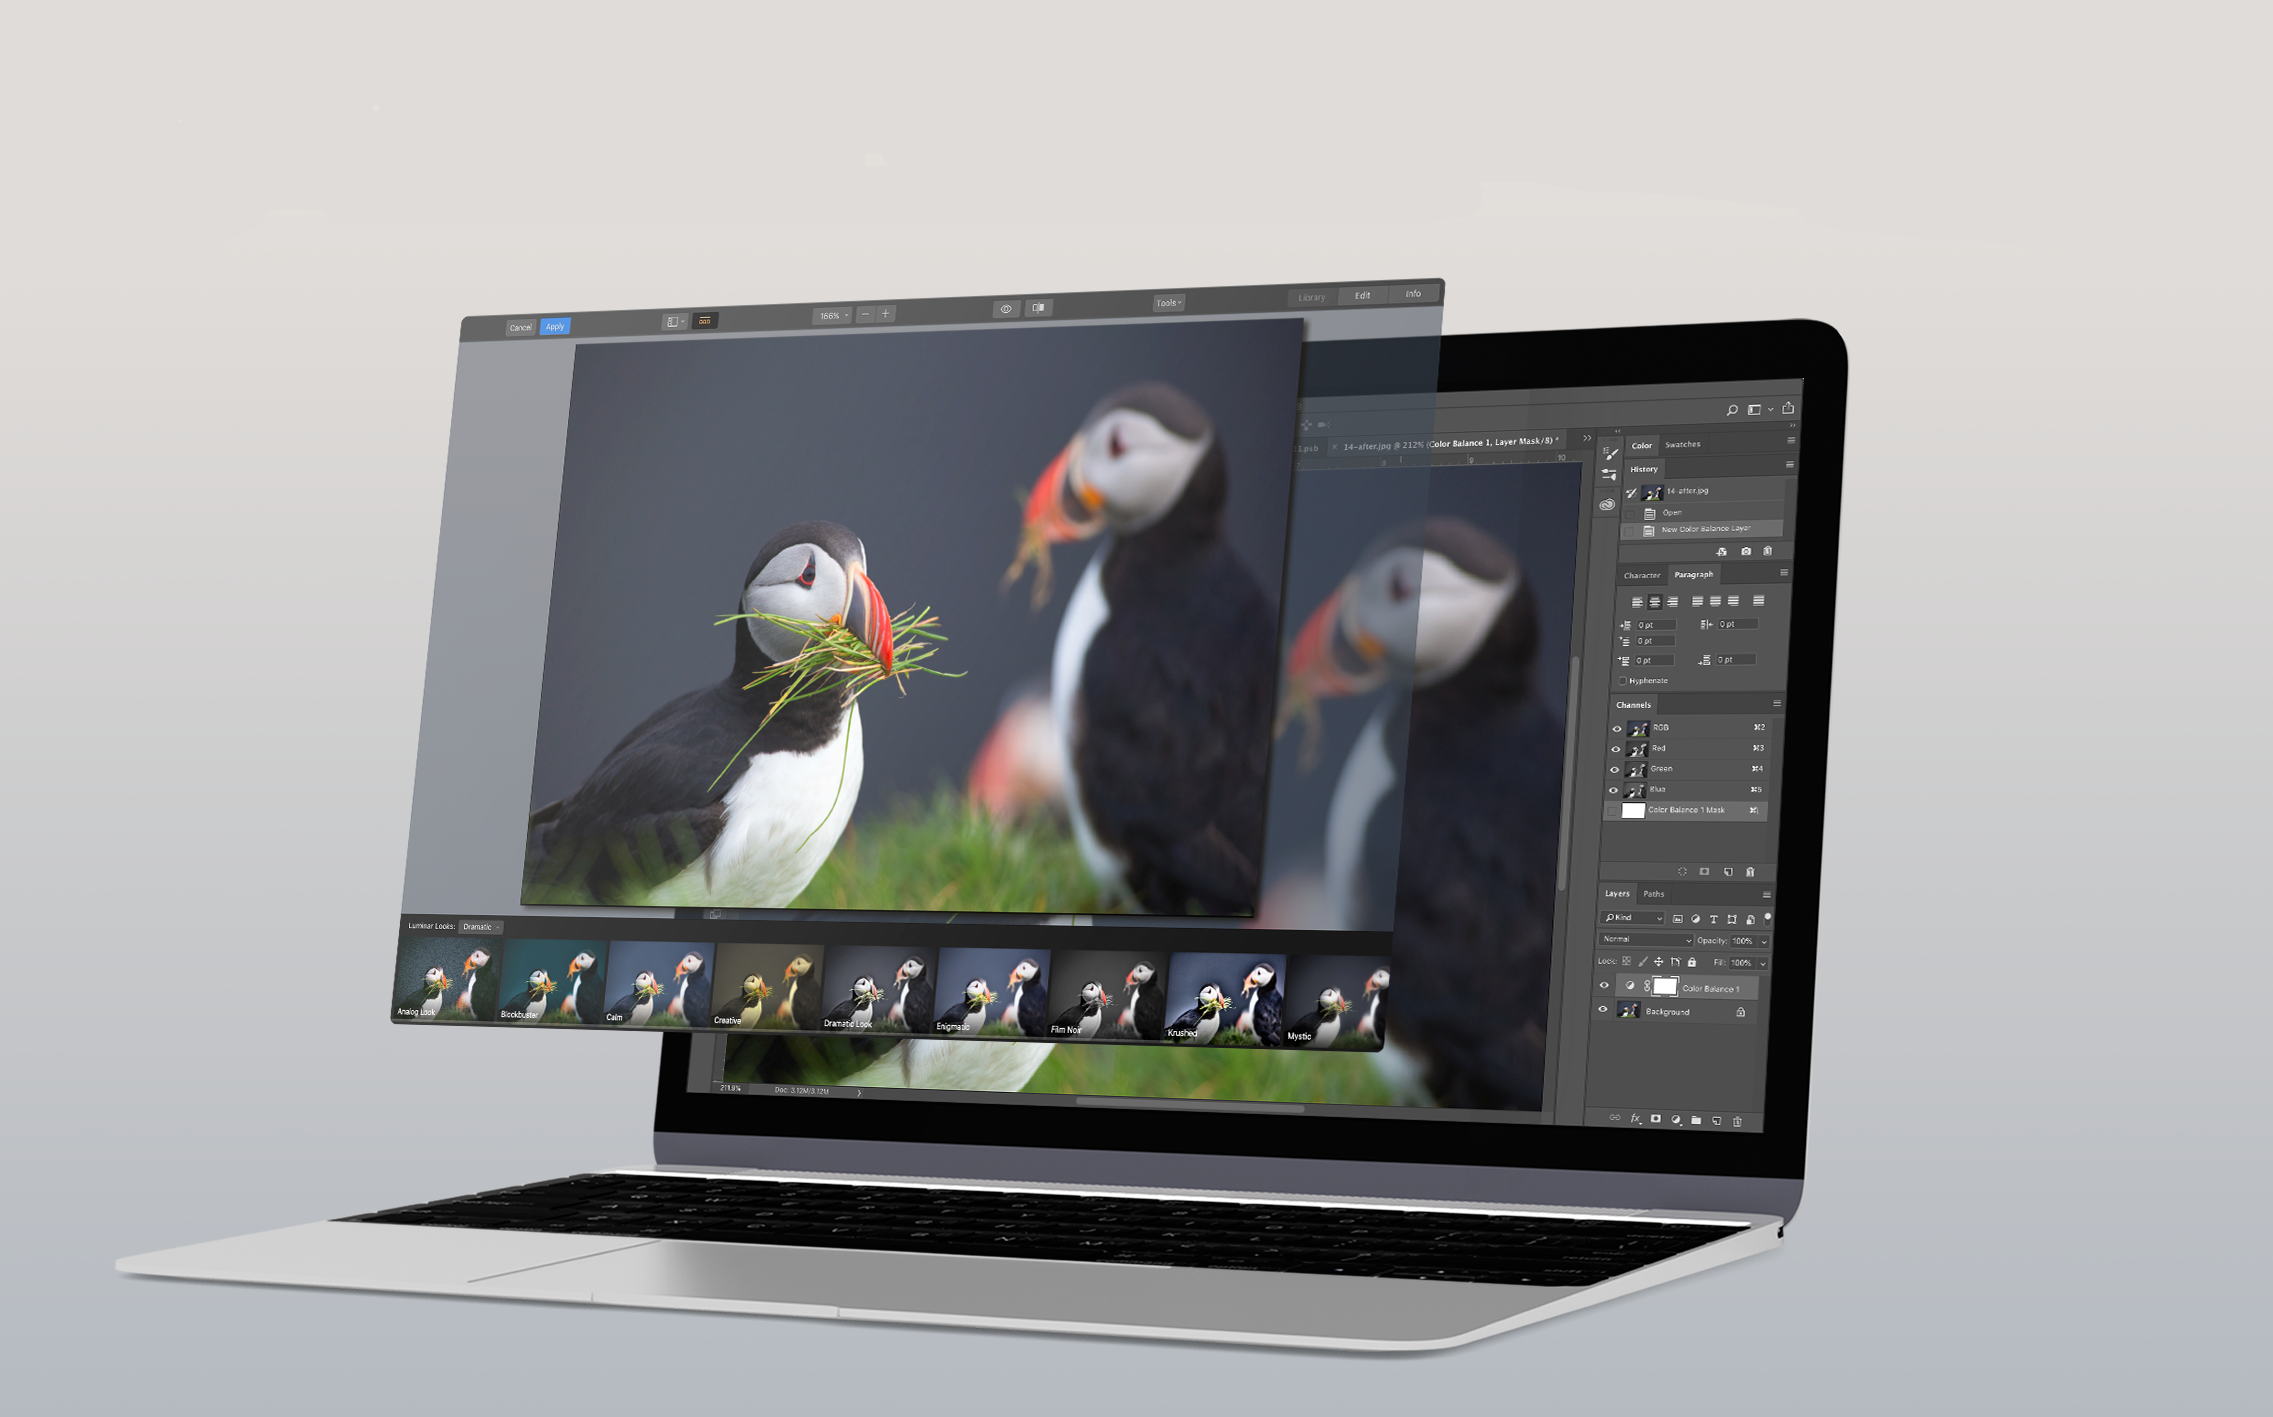
Table of Contents
What Is Skylum Luminar ?
The impetus for Skylum Luminar Neo was the desire for a photo app that makes extensive use of AI to improve and enhance your digital images. It retains the earlier Luminar application’s sky replacement and extensive set of filters, while adding unique depth-based relighting and power-line removal tools.
It also gets layer support with a library of textures and overlays. Other new features of Luminar Neo include performance boosting and mobile app syncing.
Unique adjustment tools and filters—and the fact that you can install it as a Photoshop or Lightroom plug-in—make it a worthy addition to any photographer’s software toolkit.
How Much Does Skylum Luminar Neo Cost?
Luminar is available directly from the Skylum site for $79 (often discounted), with no subscription required. Skylum is still selling the simpler Luminar AI application ($47), which is mostly about applying one-click fixes and styles to your photos but lacks some of Neo’s powerful features.
Luminar AI is available as a Store and a Mac app in the App Store; I prefer desktop apps that are available in the app stores, since they make updating and installing on multiple computers easier and are vetted for security and functionality. You can get a 30-day trial download of either from the main Skylum site menu.
For pricing comparison, Capture One costs $299, CyberLink PhotoDirector costs $99; DxO PhotoLab costs $219, and Lightroom costs $9.99 per month subscription that you have to pay for as long as you want to keep using the app.
Setting up the Program
At setup (or later), you can install Luminar Neo as a plug-in for Photoshop and Lightroom Classic, but unlike its predecessor, it doesn’t let you install plug-ins in Luminar Neo itself (for example, for Topaz noise reduction).
The program takes up about 2GB of hard drive space, similar to Lightroom’s size. When the installation is done, you sign into a Skylum account and then you’re presented with a QR code to install the companion mobile app for wirelessly transferring images.
On first run, you see a very simple interface with a big Add Photos button. There’s no explicit import process in Luminar. You choose a folder and bingo, all the images it contains are added to your Luminar catalog.
Though this means you do without things like transferring image files from a card to your computer, it does get you to your pictures fast.
You can start viewing and editing instantly. My card with 858 files was “imported” in a few seconds. Moving forward and backward through images in the catalog was also snappier than in most applications.
I would prefer that the Add Photos button could find attached camera media as many apps do, but it doesn’t. Instead, it’s simply a File Explorer, but it’s not that hard to find your camera media folder and start working on the pictures.
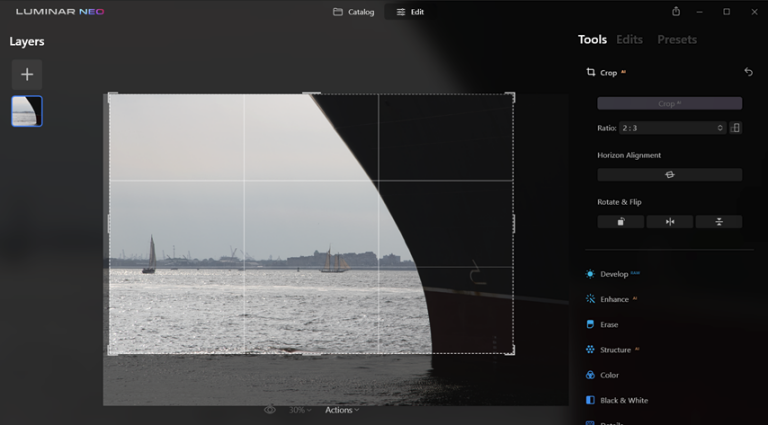
Clear, Simple Interface
The program’s compact and dark interface lets you concentrate on your picture. It’s far less busy than Capture One’s interface, though it’s not very customizable.
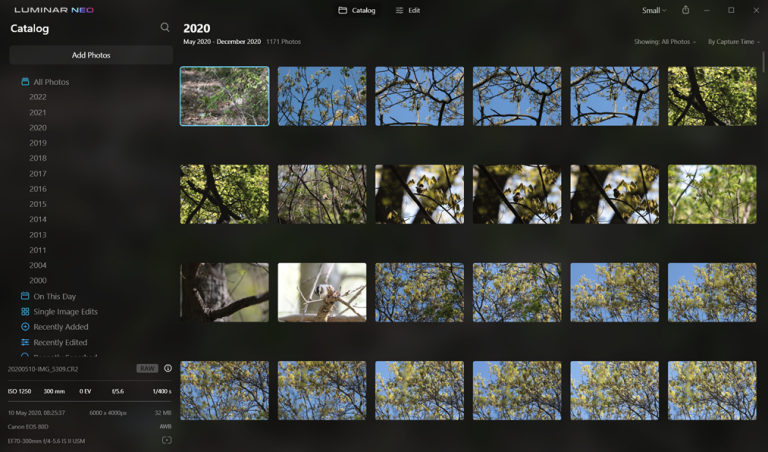
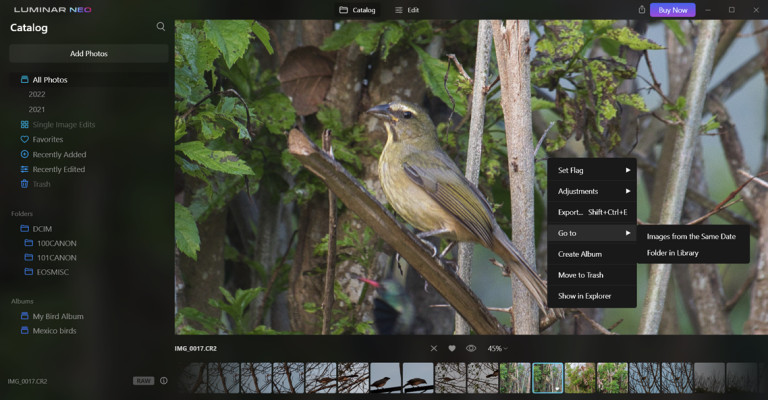
The app has only two modes, Catalog, for viewing all your images, and Edit. In Catalog view, you zoom by spinning the mouse wheel (much simpler than in Lightroom), and you’re not restricted to major stop points like 33% and 50%.
An i icon opens an info panel showing shot settings and camera model. And a search magnifying glass makes quick work of finding photos based on filename, although you can’t refine the search based on metadata such as f-stop or lens model, as you can in Lightroom and DxO Photolab.
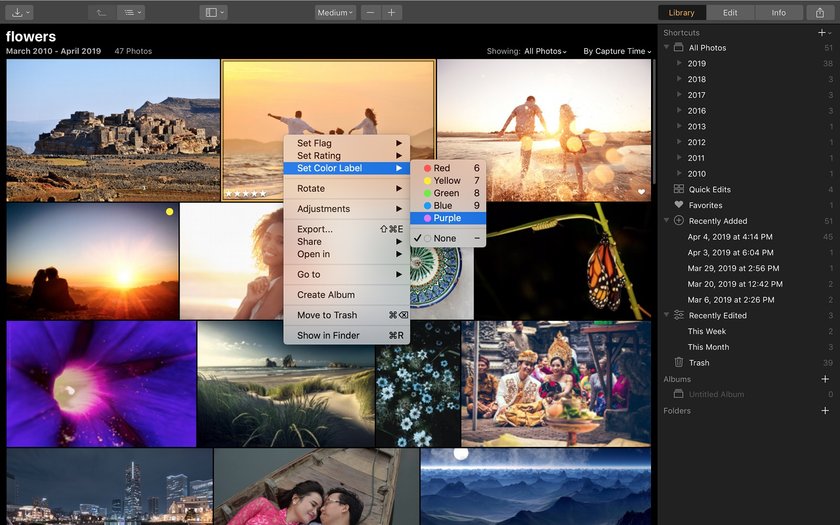
Below the image you can favorite it with a heart icon or reject it with the X for some quick culling, but there’s no keyword tagging or color coding. You also get a filmstrip ribbon along the bottom for a view of the collection.
On the left sidebar is an option to see All Photos, organized by date, with convenient filters to show recently added or edited images. Below that are computer folders and custom Albums. There are no standard program menus, like File, Image, and View, along the top. To see the standard menus, you click the Luminar logo.
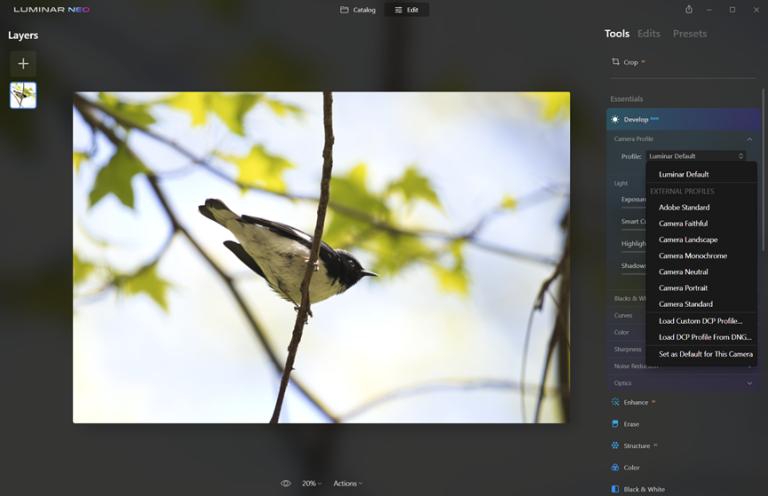
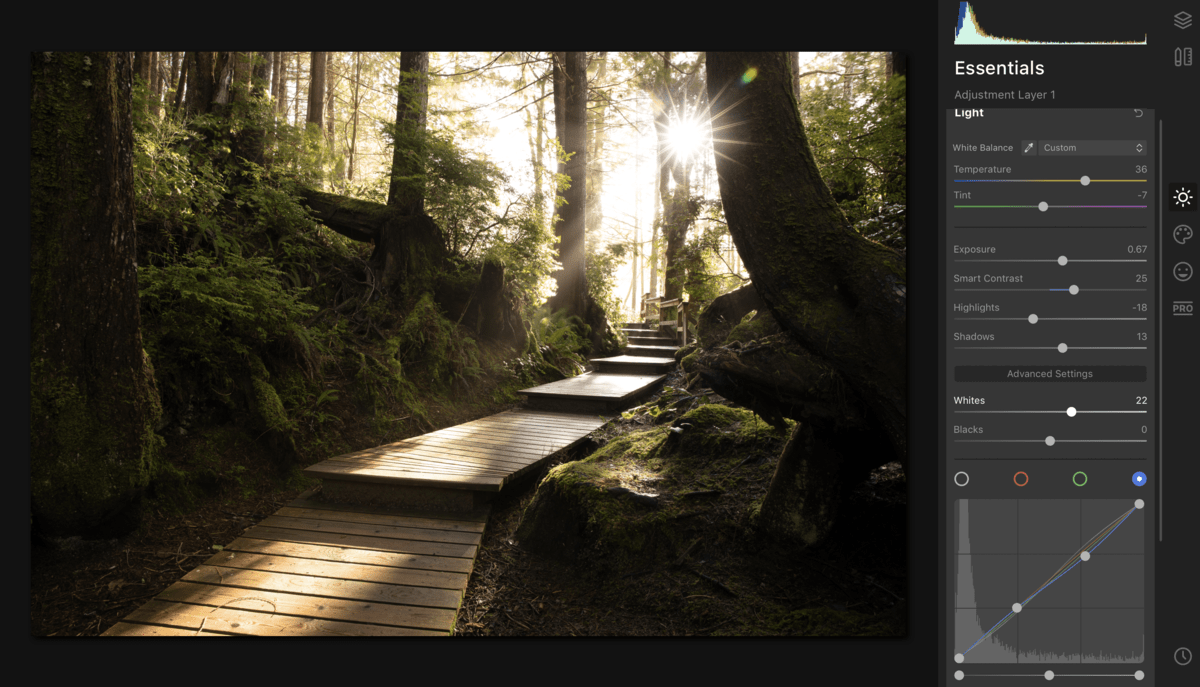
Standard Adjustments
After you choose the develop profile, a goodly group of adjustments remain in the Develop panel on the right side, including Exposure, Smart Contrast, Highlights, Shadows, Blacks & Whites, Curves, Color, Sharpness, Noise Reduction, and Optics.
That last group includes a manual barrel and pincushion slider, along with a checkbox for Defringe. For some raw file types, the menu has an Auto Distortion correction and Auto Fix Chromatic Aberrations checkboxes, too.
The CA correction worked in a test shot, as did the geometric distortion correction, but the latter took several seconds before its results appeared on my test PC.
A Skylum rep told me that the app includes a database of lens and camera profiles that are used behind the scenes for these optics corrections. For gear that’s not in the database, it uses general algorithms.
Of note is the Professional section at the bottom of the right-hand control panel, which offers separate contrast sliders for Highlights, Midtones, and Shadows. You also get Curves with RGB selectors and White balance settings with an eyedropper tool.
Special Tools
You don’t buy Luminar for standard correction tools like exposure and saturation, though. You buy it for its AI. Two unique AI-powered tools in particular stand out in the new program: Relight AI and the Erase tool’s Remove Powerlines feature.
Relight AI
This innovative tool in the Creative section may be reason enough to buy Luminar Neo. It lets you change the brightness selectively for the near and far part of the image, determined using 3D AI mapping.
You can apply Dehalo, and near and far warmth, too. The tool is good for both portraits and landscapes. Below, the model near the camera is brightened while the background stays dark.
My own test shot of a West Mexican chachalaca up a tree shows that it’s good not just for portraits. Note that the branches farther back on the right remain dark after the adjustment.
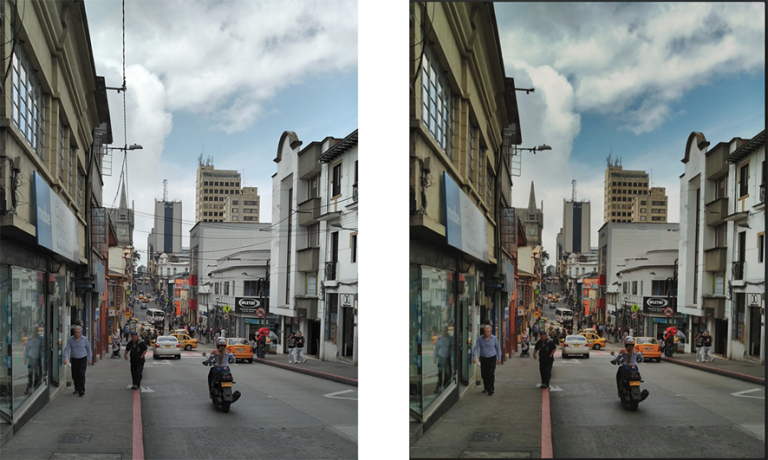
Remove Powerlines
This unique tool is found in the Erase tool group’s Objects Removal section, can improve many an urban street scene, as you can see below.
I took the opportunity to apply the program’s Old Town filter, too, for a markedly better-looking shot. Note the removal of not only the big vertical power line, but also smaller horizontal ones farther down the street. It’s quite an impressive tool!
Another new tool in the Erase group’s Objects Removal section is Remove Dust Spots. Like Remove Powerlines, it’s a one-button-press affair, although you can fine-tune results by clicking a brush over any parts you want to blend in. It’s similar to Photoshop’s content-aware spot healing tool.
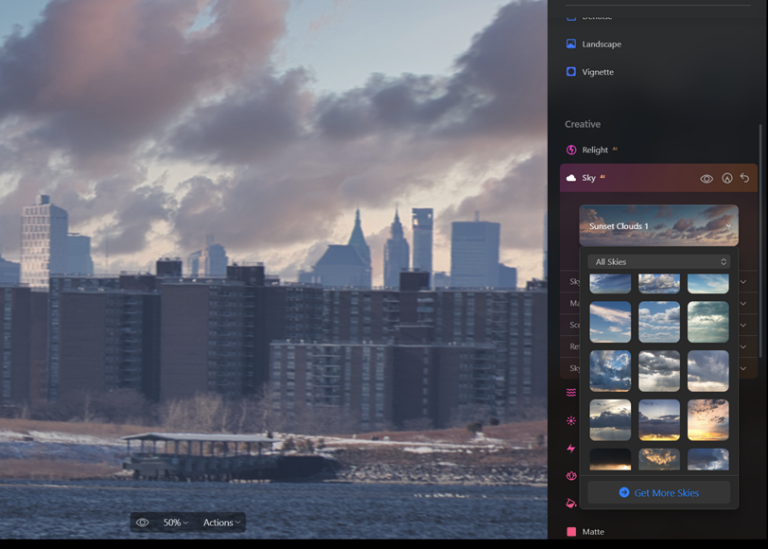
You still get Skylum Luminar’s signature sky-editing tools, which do an excellent and effort-free job of determining what’s sky and what isn’t and replacing the latter with a more beautiful one. You also get Portrait Bokeh, Face AI, Skin AI, and Body AI features.
The last lets you trim a few pounds off your subject and slim that waistline a bit. It did a good job identifying human forms in my testing. The Face AI tool offers Light and Slim sliders which also did a convincing job.
Layers
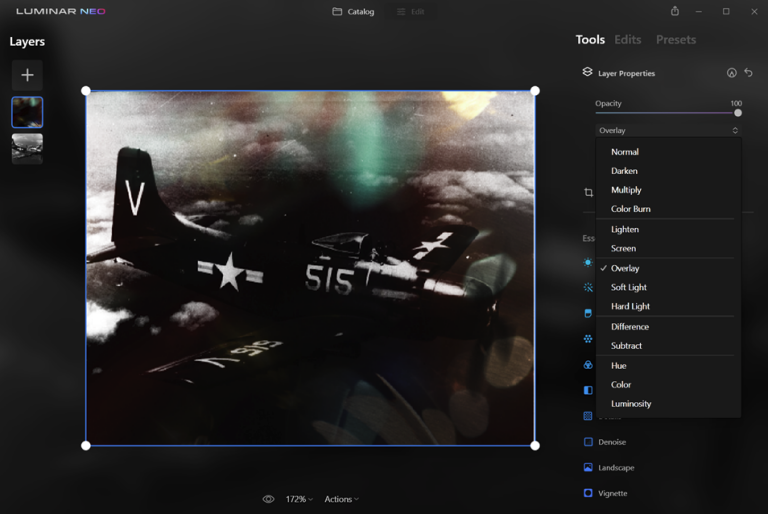
Layers are new to Luminar. They let you add overlays and use various blend modes—Darken, Multiply, Screen, and so on. They’re not as complex and intimidating as Photoshop’s layers, but they’re quite useful and powerful enough to create some cool effects.
You can use them with your own images for a double exposure effect. You can apply adjustments like Exposure to just the new layer, but when I selected the original layer, the adjustments applied to all layers—Photoshop gives you more control over the selection of layers for editing.
In the Mood section under the Creative category, you find a generous selection of LUTs in categories like Cinematic, Creative (including B&W choices), Cross Processing, and Portrait Lighting. Sliders adjust the strength of these effects as well as their contrast and saturation.
Landscape
This tool section offers Dehaze that doesn’t add a color cast the way Lightroom’s does, along with Golden Hour and Foliage Enhancer, both of which add a nice touch when used in moderation.
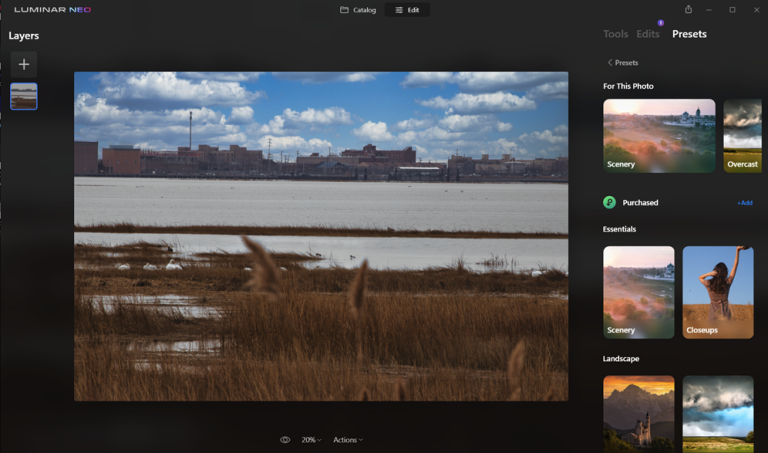
Presets
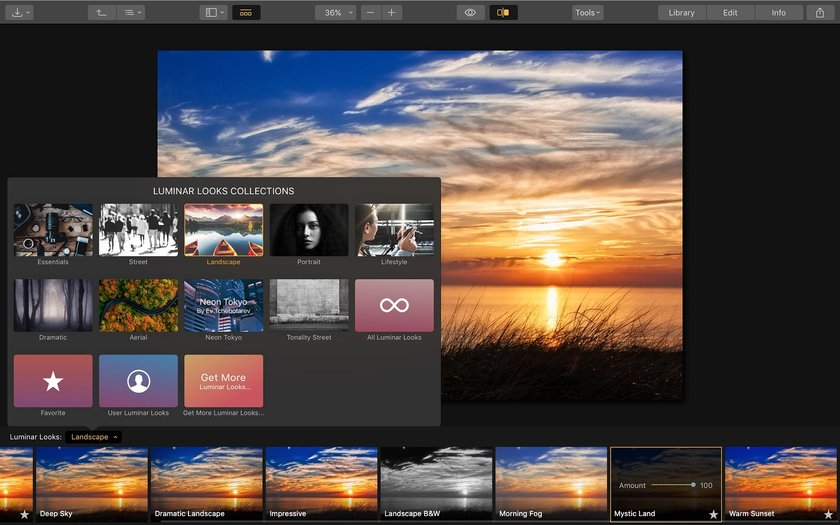
This is the rightmost option in the Edit panel, offers one-click fixes like you get in the company’s other, simpler product, Luminar AI. These presets can turn a drab shot into an arresting one with minimal labor.
Choose from illustrative thumbnails for Portrait, Landscape, Macro, Lifestyle, Filmatic, and more. Again, sliders let you increase or decrease the effects’ strength, and if what’s included isn’t enough, Skylum sells more sets of presets on its website.
Performance
Using some of the AI tools still made my graphics card fan whir up when testing on Windows 10, and it could take a while for an image to update with an edit. I prefer seeing some indication of processing, as Lightroom does.
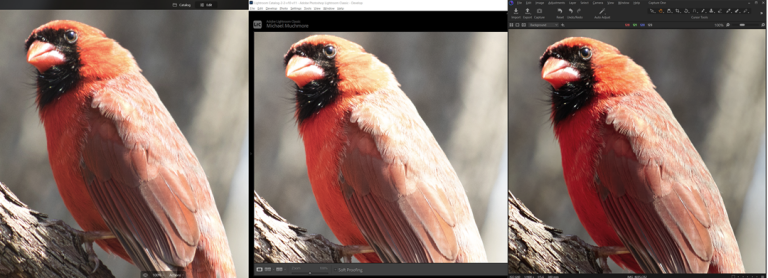
Luminar started life as a macOS photo-editing app, so I also installed it on an M1-powered MacBook Air to see how it performed there. The AI is done on your local machine, not in the cloud, which is a plus.
As mentioned, there’s no importing from memory cards, so that’s not a performance factor. The program was very stable, which can’t be said for all apps that do high-level AI computing on large media files.
Output and Sharing
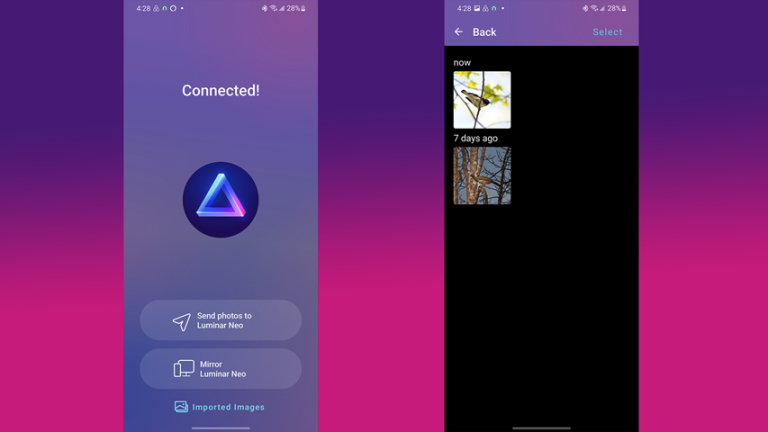
A companion mobile app for Luminar Neo lets you transfer photos from the desktop version of the app to your smartphone. The iOS version lets you see live edits on the phone, while that same capability is planned for the Android version.
You simply scan a QR code with the phone and you’re good to go. You can also send images from the phone to the desktop app; they appear in a newly created folder in Catalog view. Other options include exporting an edited shot to a local folder or to your email client.
The Print option in the main menu exports the editing photo and brings up the OS’s printing feature, but there are no layout or contact sheet options.
Unique AI Fixes and Effects
Luminar Neo is designed as a photo optimization and enhancing tool, replete with AI photo fixes and effects. It’s a pleasure to work in, thanks to a clear, usable interface. While you can organize your catalog with albums and pick/reject, Luminar Neo isn’t a full workflow solution, so you may be better off using it as a Lightroom Classic plug-in.
It does some impressive things with your digital photography, so it’s well worth getting if you love perfecting and creating with your images.
Conclusion
At Skylum, we’re pretty proud of our work on Luminar 3. And because we take each Luminar review seriously, we’re also incredibly appreciative of the support and feedback we’ve received from our beta testers, reviewers, and users throughout the last several years.
Luminar simply wouldn’t be what it is today without the exceptional community of savvy photographers who use it and who have graciously shared their experiences and insights with our team. If you’ve been a part of that, the entire Skylum team sincerely thanks you.
If you want to know more about our software, we encourage you to read additional Skylum Luminar reviews and see for yourself what this smart photo editor and photo organizing software can do for you. Read photo editing software reviews for other applications too, while you’re at it — we’re confident Luminar 3 stacks up to the competition.
And if you try our software and love it — or if you spot something that you’d love to see improved! — feel free to drop us a line or write your own Luminar review. We’d be happy to hear from you.
If you haven’t used Luminar 3 with Libraries yet, we’d like to invite you to try it out. It’s the result of a lot of hard work and dedication by the team at Skylum, and we’d love for you to give it a go.

Raymour & Flanigan Review: Is This Furniture Retailer Worth Your Money?

Raymour & Flanigan Honest Review

Squarespace Honest Review for Modern Websites

Envato Elements Review – Features, Advantages, Disadvantages, Pricing Analysis

Is Hostinger Good For eCommerce
